Guide to Create and Synchronize Products from BurgerPrints to Shopify
Creating and synchronizing products from BurgerPints to Shopify can only be done through the Products section on the BurgerPrints system. This article will guide you through the detailed steps to create and synchronize products from BurgerPrints to Shopify, helping you sell products on both platforms.
To synchronize products from BurgerPrints to Shopify, you can either sync them while creating the order or after the order has been created. The steps are as follows:
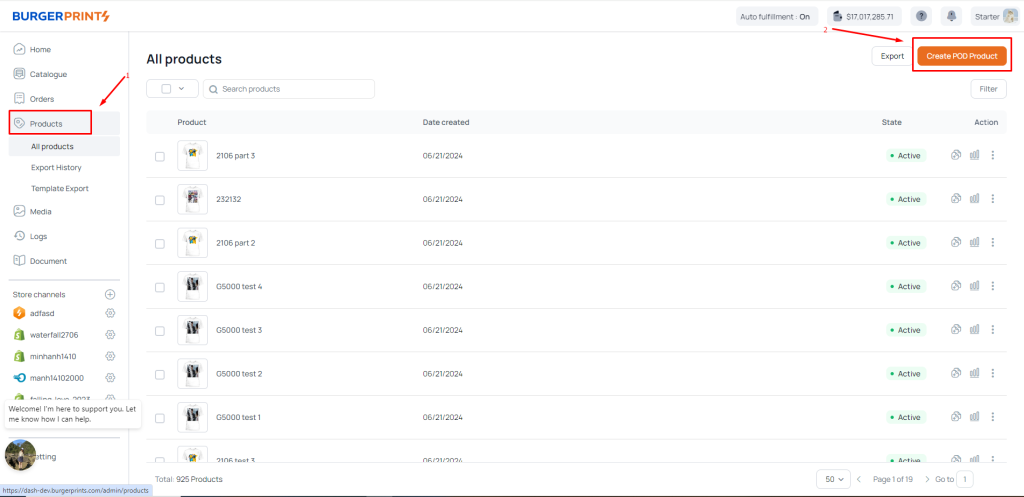
Step 1: To create a Product, you need to access the dashboard, then click on Products. In the Product interface, click on Create Product.
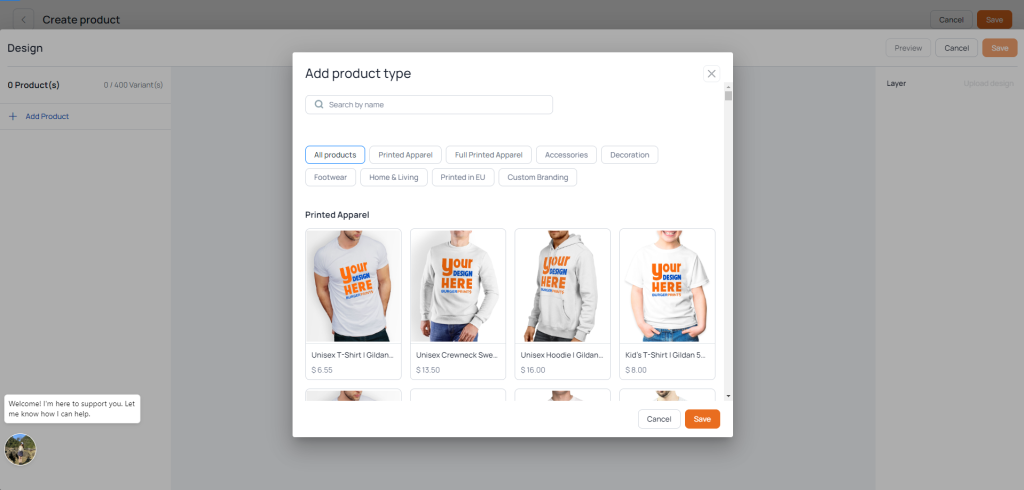
Step 2: In the Create Product interface, you have options to add one or more types of products in the Add product type section. Then click Save.
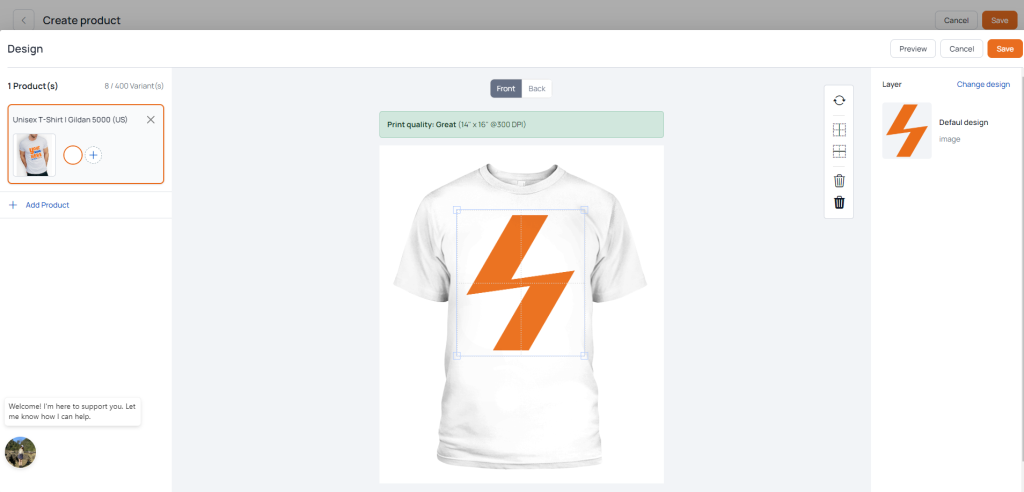
Step 3: At this point, you will be taken to the Design interface to create a design for the product you have selected. Press save after completing the design.
Step 4: Fill in the information as instructed, similar to the instructions for creating a Product on BurgerPrints. This includes sections such as Info, Design, Mockup, Tag, Default image, SEO engine.
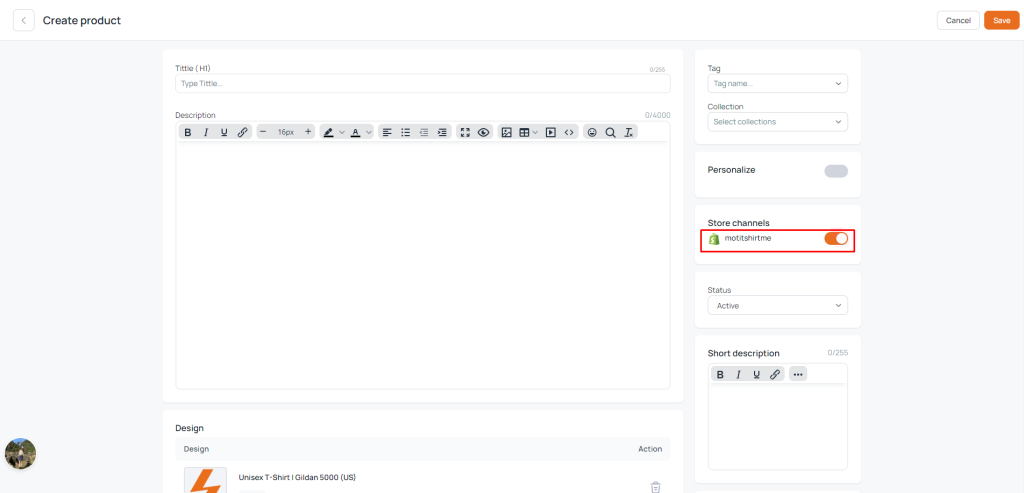
In the Store channels section, if you have already connected your Shopify store with BurgePrints, this section will display the information of the store on Shopify. Toggle the switch to the right to synchronize, then click Save. This way, you have listed the product on Shopify when creating it in the BurgerPrints system.
Additionally, to synchronize existing products to Shopify, you only need to click on the name of the product to go to the editing interface.
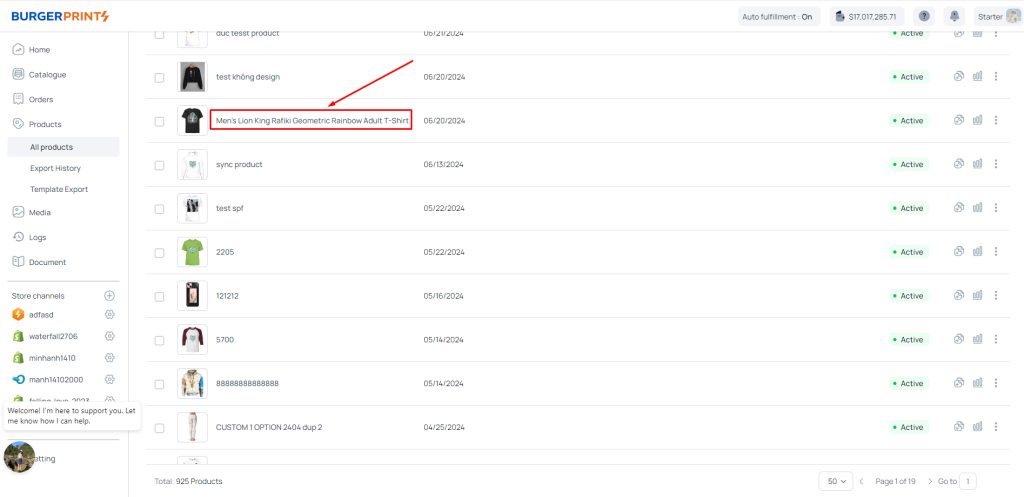
Click on the previously listed Product title in Products
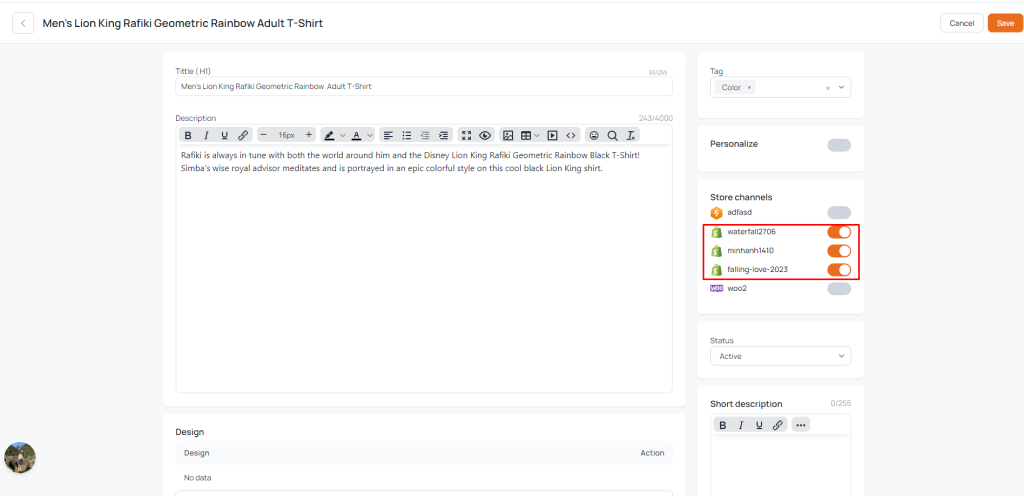
In the Store channels section, switch the toggle to the right to sync the available products with Shopify. After that, click Save to save your changes


 Tiếng Việt