


 English
Here’s a guide on how to create an order with Printed Apparel products that include arm print areas.
To meet the diverse fulfill needs of Sellers, BurgerPrints has officially expanded the printing areas for Printed Apparel products. In addition to the front and back print areas, Sellers can now add creative designs on the sleeve print area, creating unique and sophisticated products to attract customers.
Currently, BurgerPrints offers the following methods for creating orders with Printed Apparel products that include sleeve print areas:
- Create orders directly on the system
- Create orders using a CSV file
- Create orders using an API
Instructions for creating orders directly on the system:
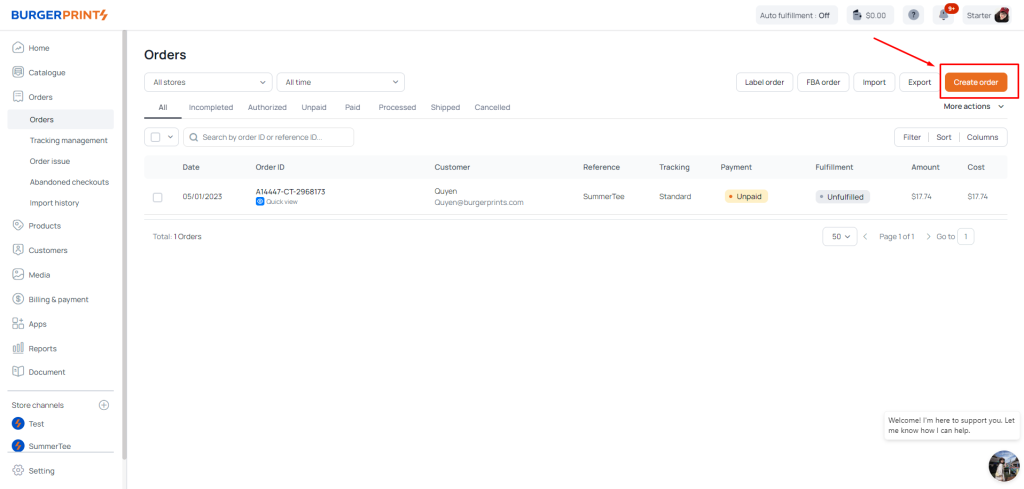
Step 1: Log in to your account at https://dash.burgerprints.com/. On the BurgerPrints Dashboard screen, select Orders >> Create Order
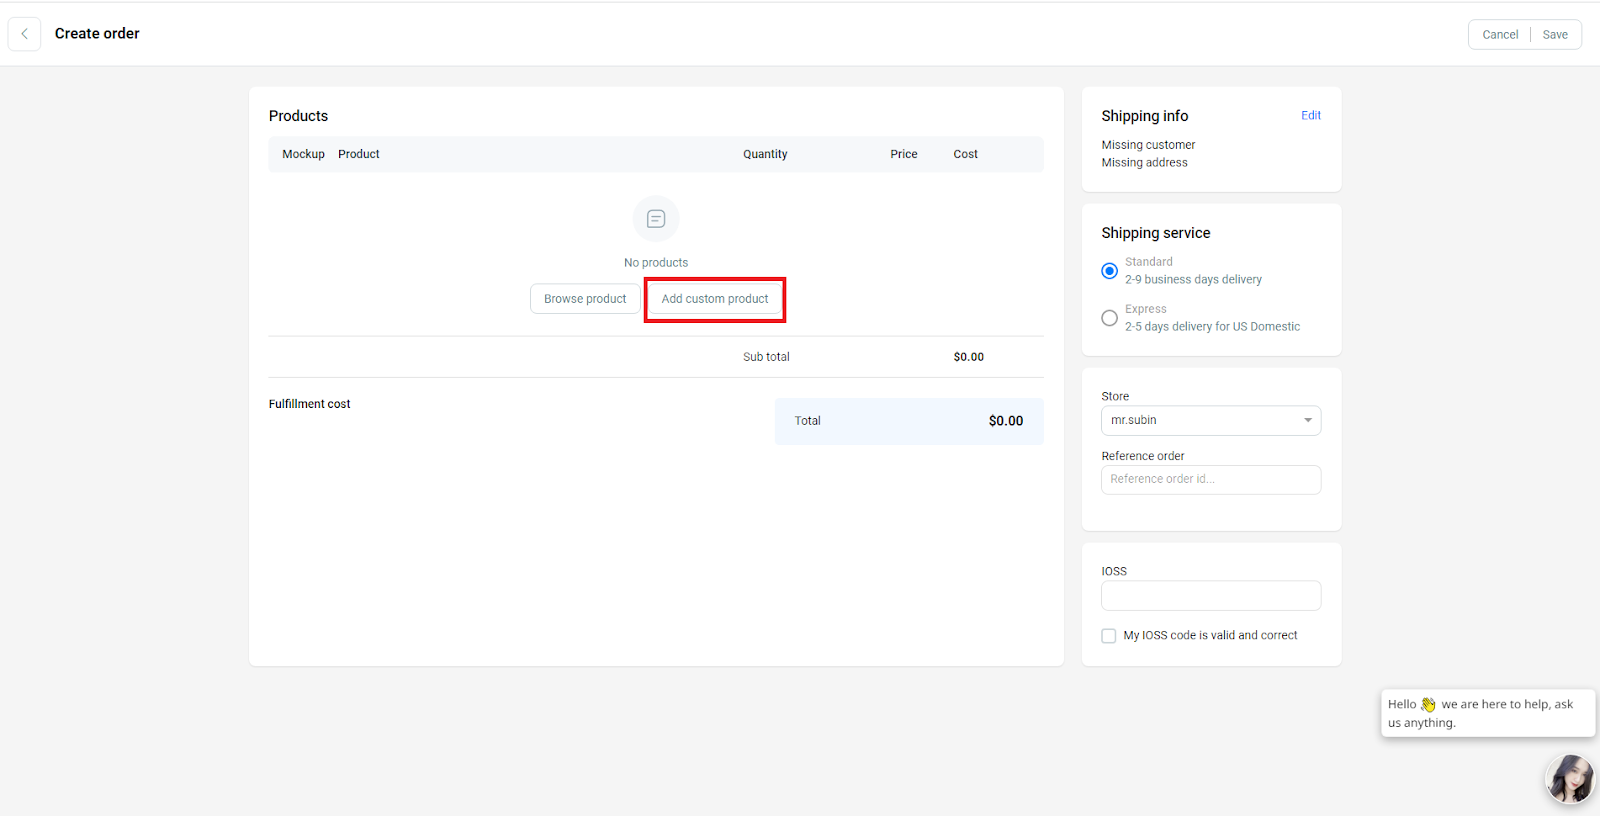
Step 2: On the Create Order screen, click on “Add custom product” to add a new product that you want to include in the order.
In the Product info section, select:
Base: to choose the type of product you want to order. Note that orders with arm print areas apply to Printed Apparel products except for Tank-top products.
Location: choose the production location. Note that orders with arm print areas only apply to Printed Apparel products fulfilled from the Denali location.
Color: choose the colors.
Size: choose the size for the product.
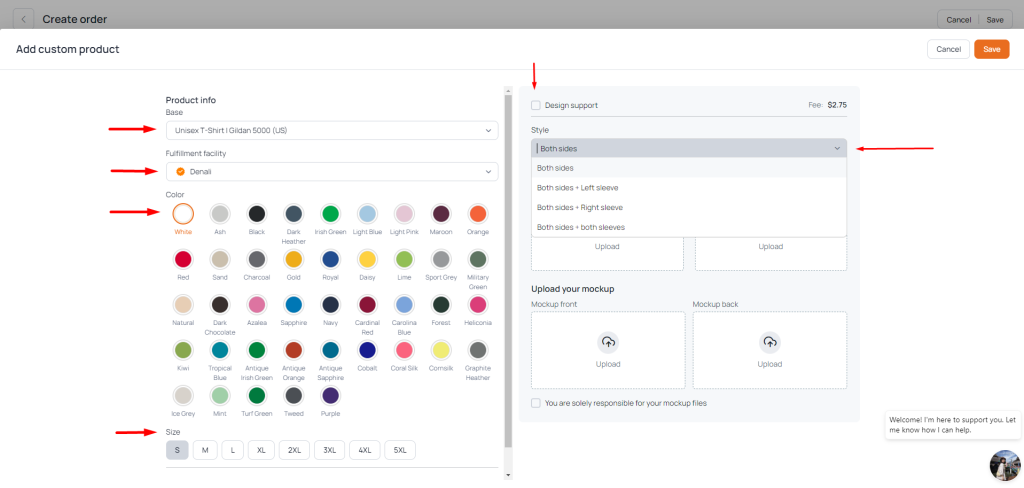
Then select Style – choose the print area you want. Here, you can choose the print area on the sleeves with the following options:
Both sides + Left sleeve: includes the print area on the left sleeve
Both sides + Right sleeve: includes the print area on the right sleeve
Both sides + both sleeves: includes the print area on both sleeves
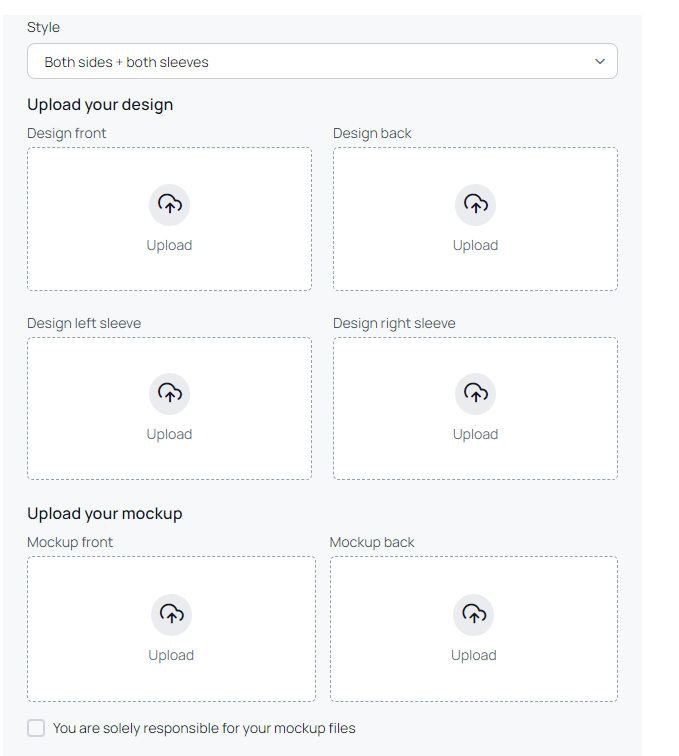
Next, at “Upload your design,” click on “Upload” to upload the design you want to print on the product, including the front design, back design, left sleeve design, and right sleeve design. At “Upload your Mockup,” click on “Upload” to upload the product mockup, including the front mockup and back mockup.
Note:
Short sleeve design has a resolution of 1200×1200.
Long sleeve design has a resolution of 1200×4800.
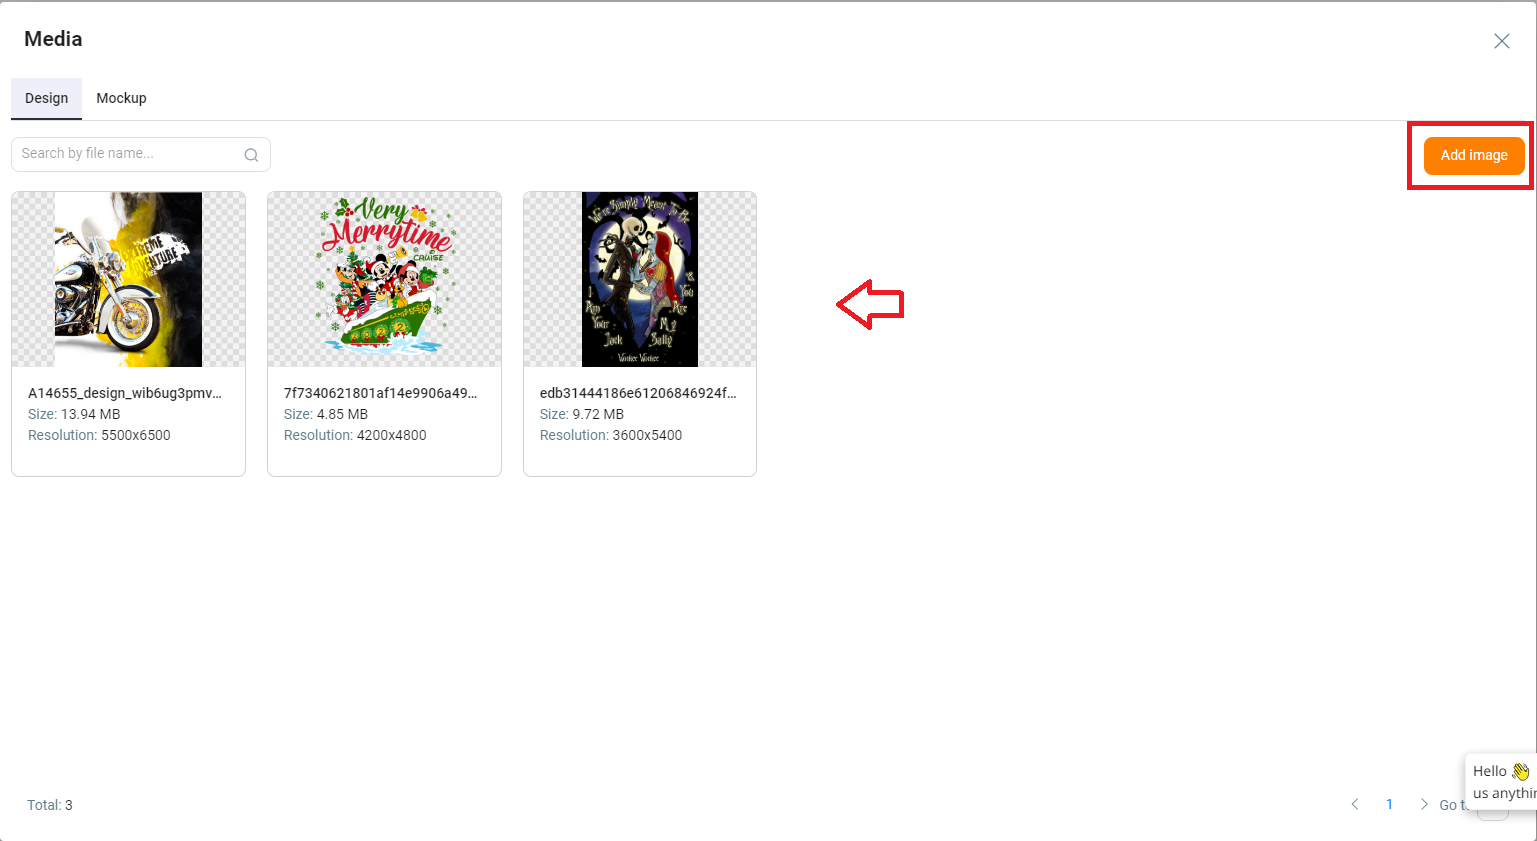
The uploaded image will be saved in the Media section.
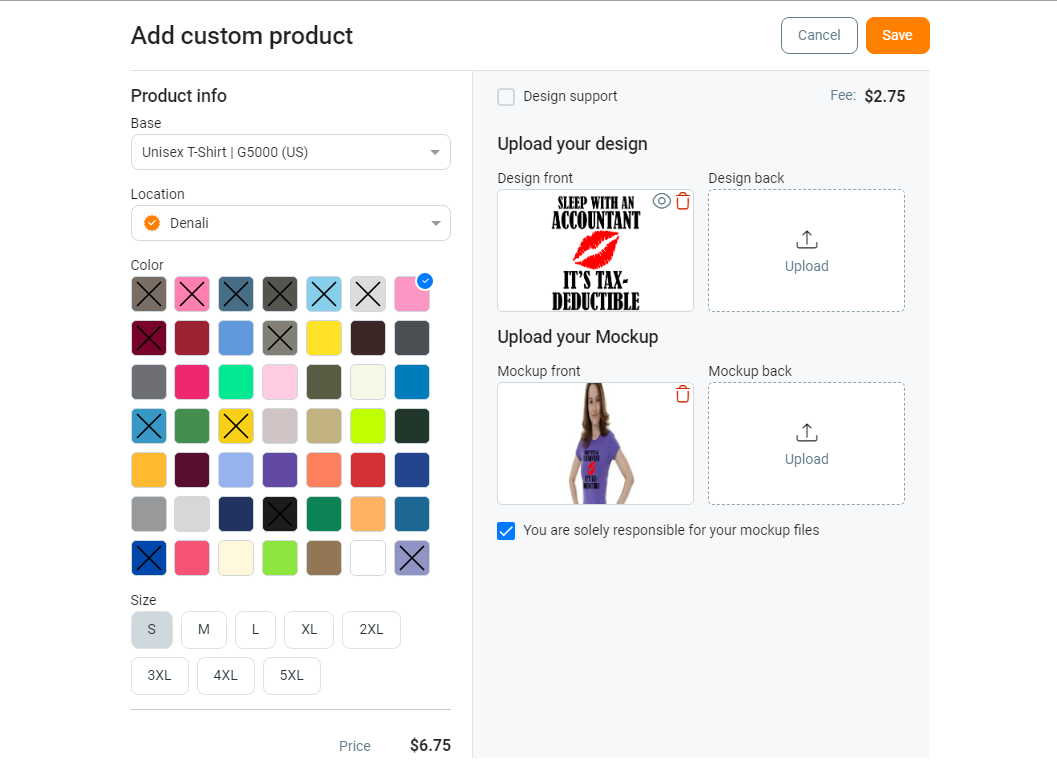
Then, check the box: “You are solely responsible for your mockup files” to take responsibility for the mockup files you have uploaded. After that, click Save to upload the product.
Additionally, if you only have mockups and want to use the Design service from the BurgerPrints system, you can refer to the guide on creating an order using the Design Support service.
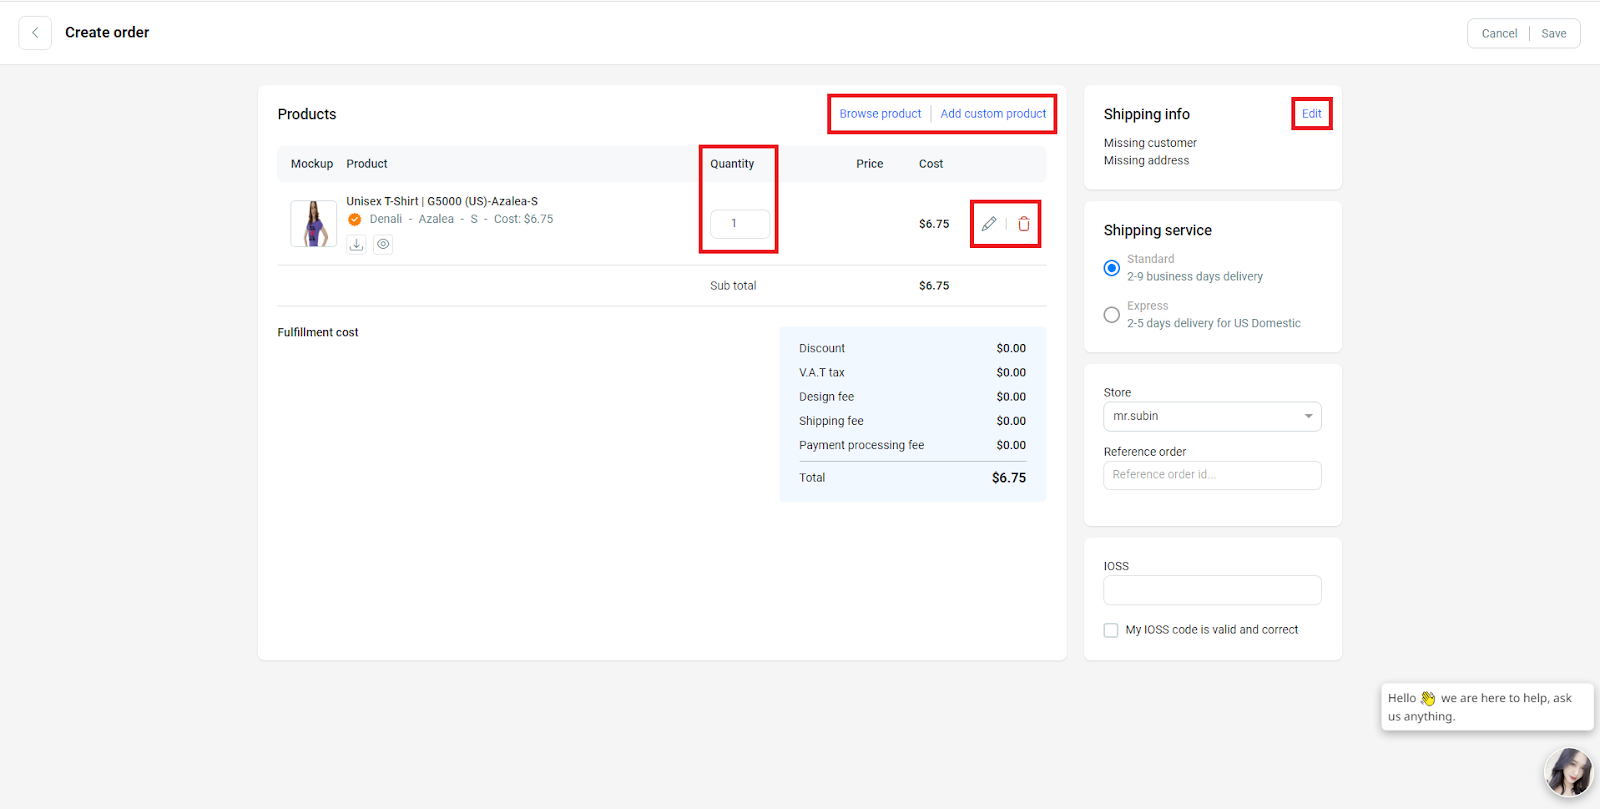
Step 3: After adding the product, in the Products interface, click on Quantity to select the desired production quantity, as well as detailed information about the product cost.
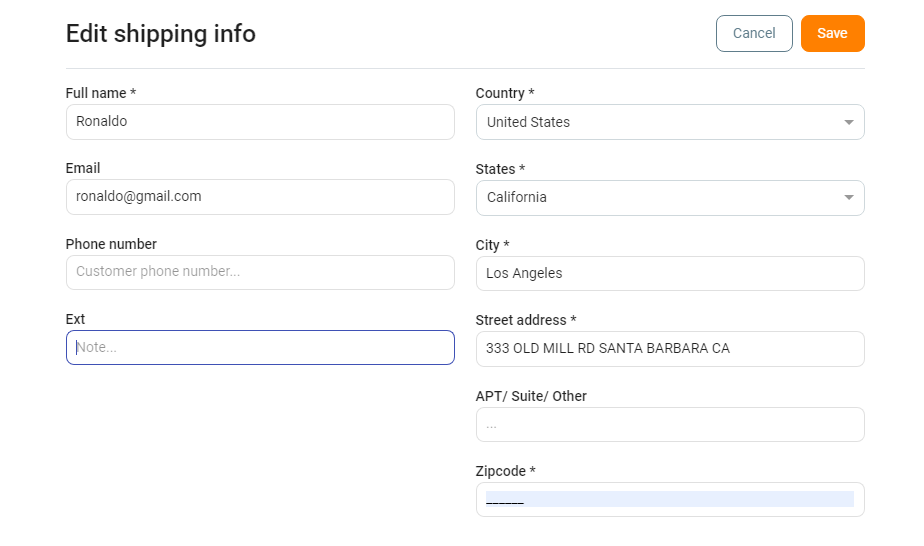
Then, in the Shipping info section, click on Edit to enter the recipient’s information, shipping address, etc. Click Save when finished.
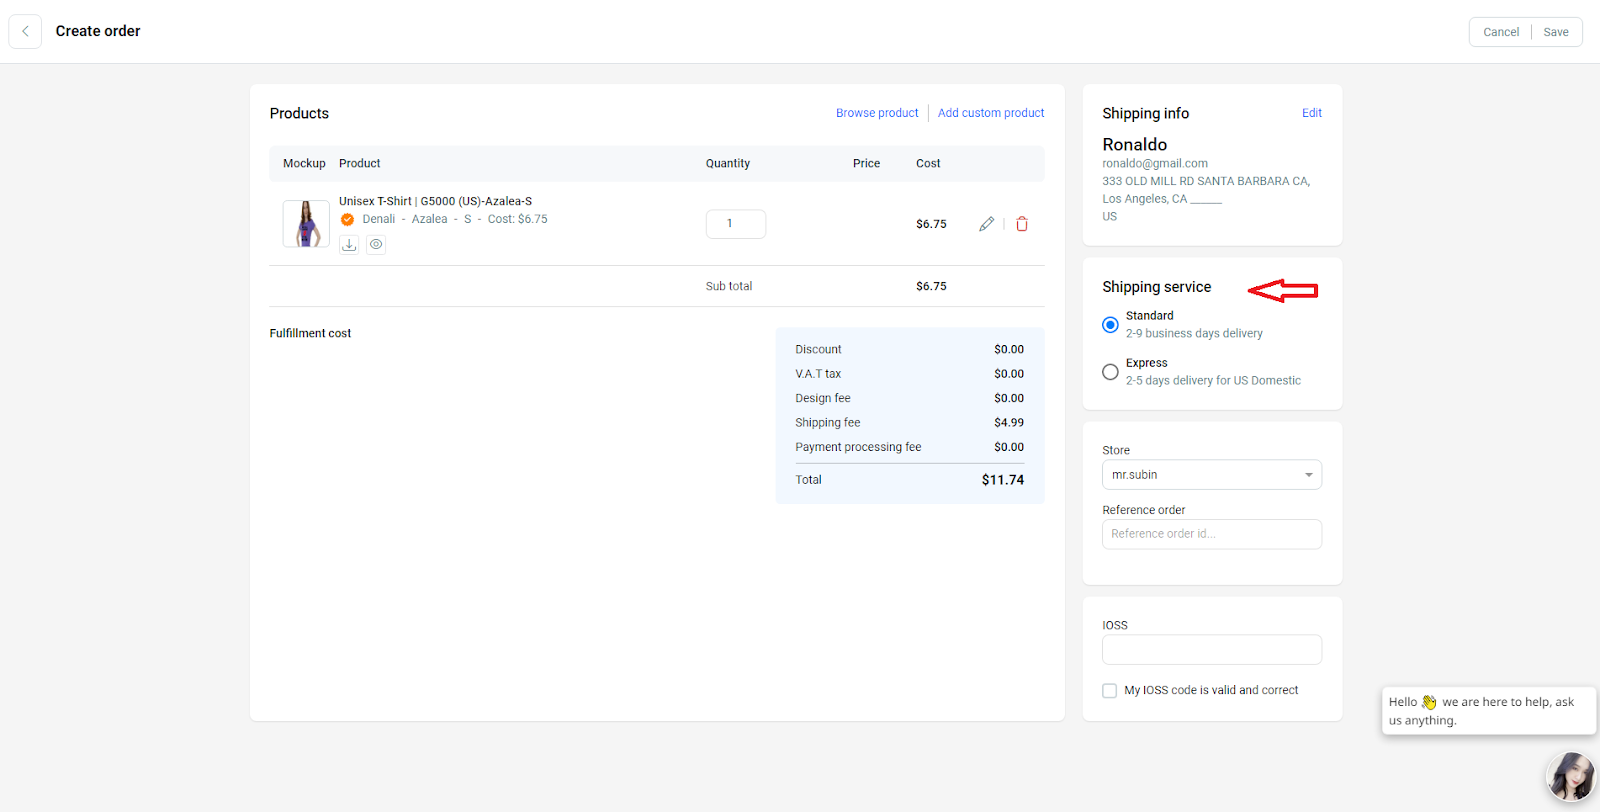
In the Shipping service section, select the shipping provider as required.
The Store section is where you select the seller’s store address. Reference order is the order code that allows users to create their own code for the purpose of synchronizing the order code in the store as well as easily searching for the order when needed.
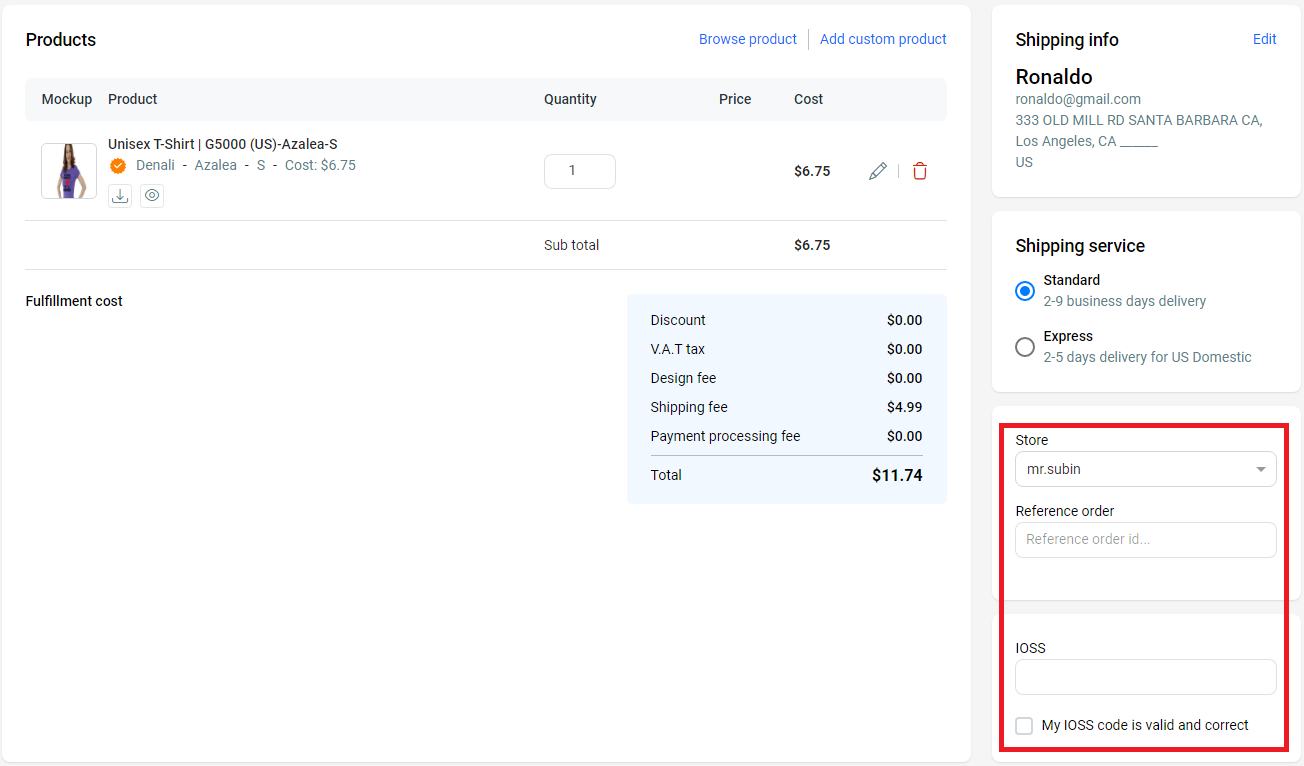
IOSS is the EU tax code entry for orders shipped to the EU. If the user does not provide this code, the system will automatically use BurgerPrints’ code, and you will have to pay a fee to BurgerPrints. If you already have a valid code and enter it yourself, check the box “My IOSS code is valid and correct”, and you will not incur any additional fees.
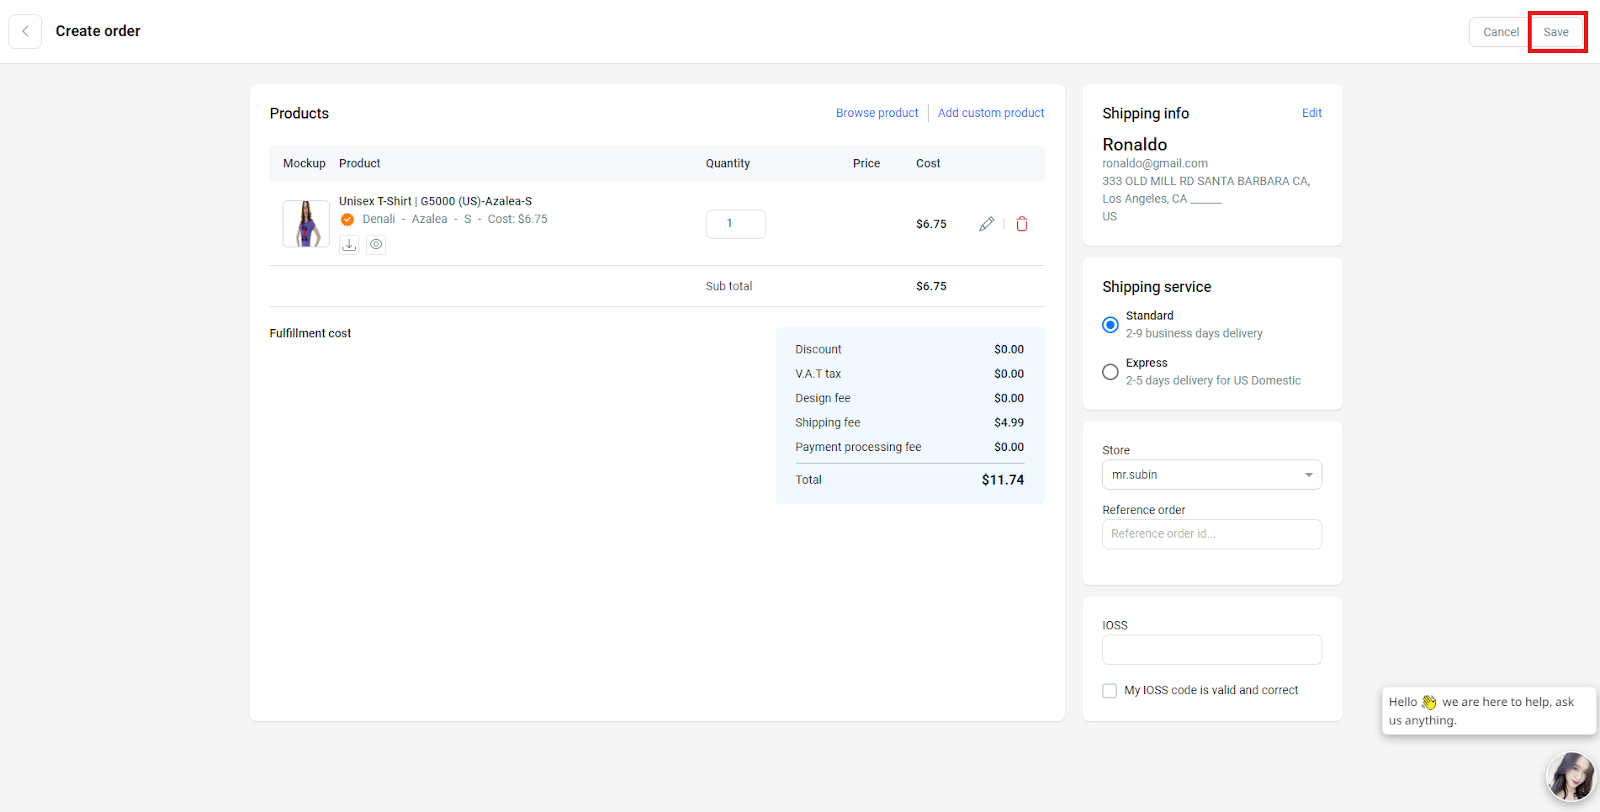
After entering all the above data, click Save to create the order.
Creating an Order using a CSV File
To create a new order with an arm print area using a CSV file, you need to access the BurgerPrints Dash system and follow the instructions.
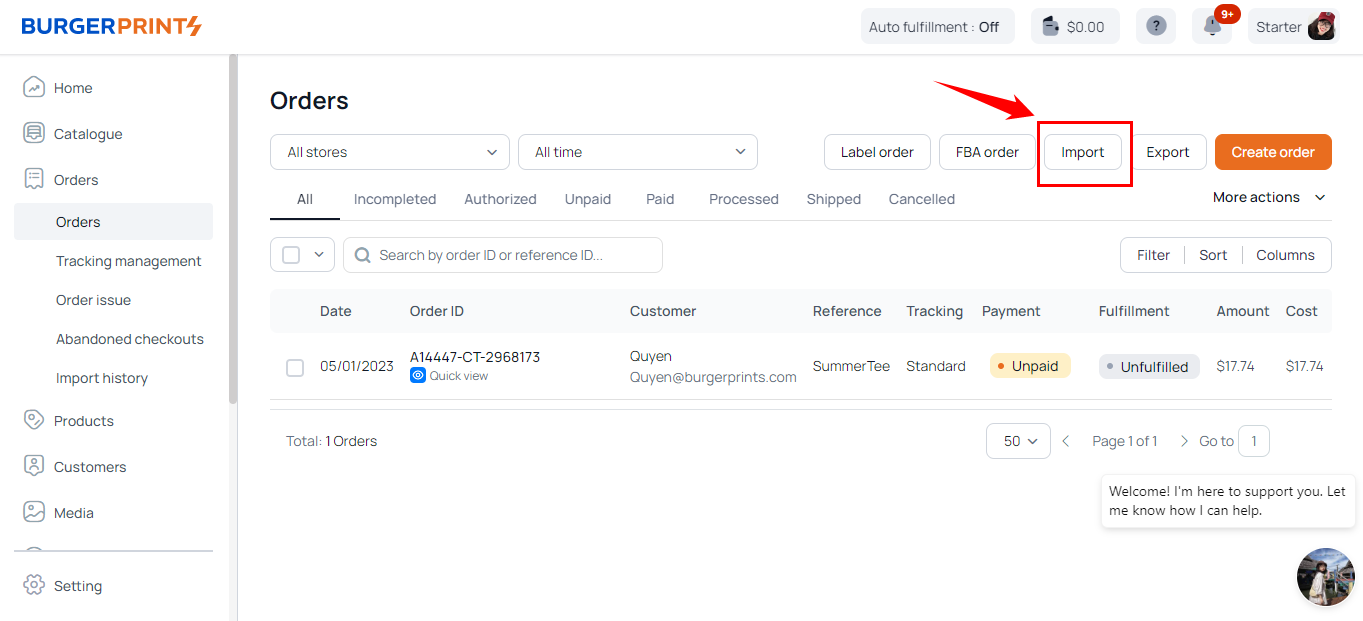
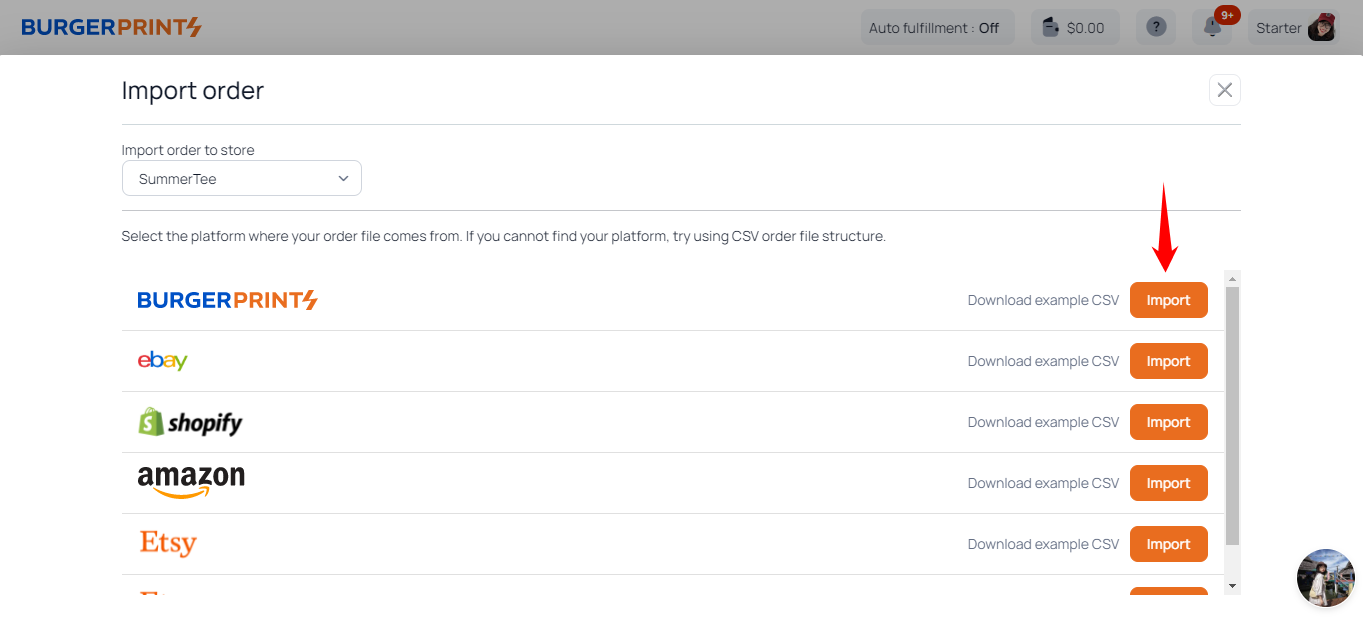
Step 1: Select Order and click Import.
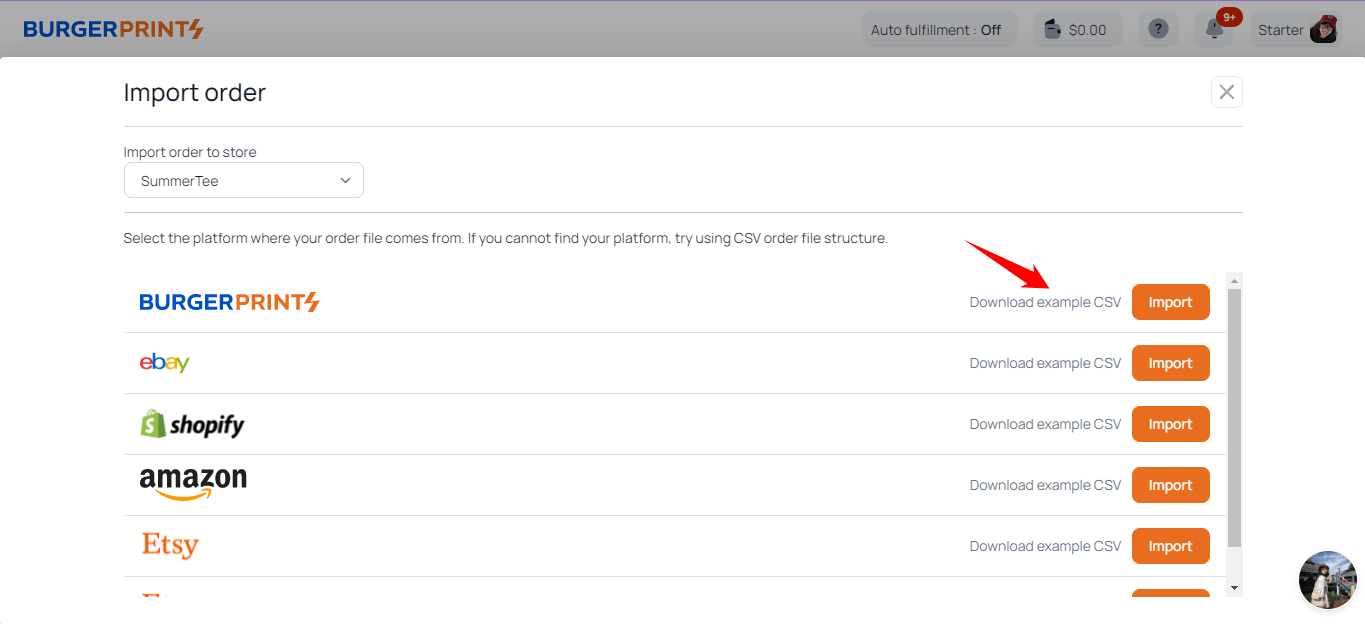
Step 2: In the Import order interface, you will see the order placement platforms. Select the platform you want to create an order with using CSV and click on Download example CSV to download the file.
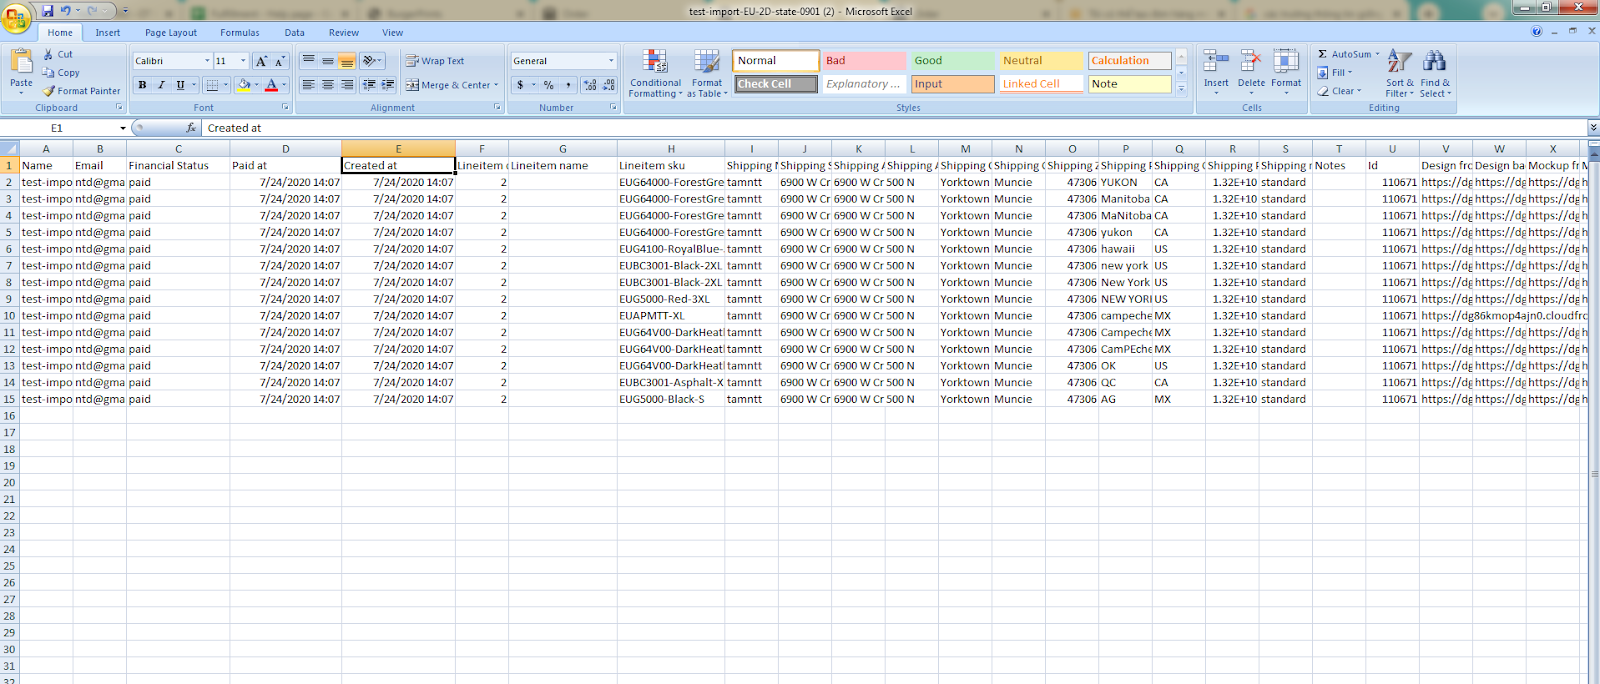
Fill in the CSV file according to the instructions. Note that the fields for Left Sleeve and Right Sleeve refer to the sleeve design. For short sleeve designs, the resolution is 1200×1200, and for long sleeve designs, the resolution is 1200×4800.
The required information that needs to be filled in includes: Name, Line-item quantity, Line-item SKU, Shipping Name, Shipping Address1, Shipping Address2, Shipping City, Shipping Zip, Shipping Country, Design front URL, Design back URL, Mockup front URL, Mockup back URL, Check valid address, Left Sleeve, and Right Sleeve.
Name Field: You should enter the corresponding order code created on the sales page to synchronize and facilitate order management.
For orders with 2 or more products: if the order has 2 or more products, fill in each product in a separate row. The information in the row below should be identical to the original row, only filling in the columns: Line Item quantity, Line-item name, Line-item SKU, so that the products ordered by the customer are grouped under one order code.
For orders with multiple items: the information fields should be the same except for the columns Line-item quantity, Line-item name, Line-item SKU, Design front URL, Design back URL, Mockup front URL, Mockup back URL. Therefore, in the same order, if there is an item with missing (or incorrect) information combined with an item with sufficient information, the system will check which item has sufficient information and use that information. If none of the items have sufficient information, the order will default to the status ‘Incompleted’ pending additional information.
Note:
– The system only recognizes design files and mockup files entered as .png or .jpg images.
– The design link must ensure that the design is provided in the correct size required on the Catalog for each product, with 300 DPI.
Step 3: After completing the CSV file, proceed to import the file into the system. New orders will be updated in the Order section.
See more notes on creating orders using CSV here!
Create Order via API
BurgerPrints provides Sellers with a way to create orders via API using the Postman API software. With this method, BurgerPrints has added the fields design_right_sleeve and design_left_sleeve in the API when creating an order. Sellers, please refer to the detailed instructions on how to create an API order here!
If you have any questions or encounter any errors during the order creation process with the sleeve print area, please contact our support team immediately for the best assistance.